

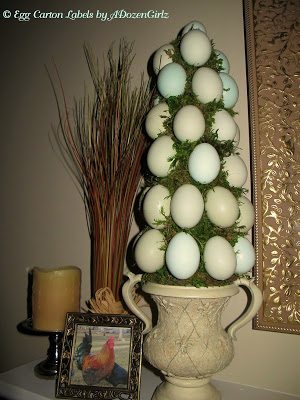
I’m always looking for fun projects using blown eggs from my backyard chickens since I started egg-blowing and decorating several years ago. This egg topiary is a great way to display my hens’ beautiful eggs all year long. Once the eggs have been emptied and dried, the project is simple.
DIY BLOWN EGG TOPIARY
SUPPLIES NEEDED
styrofoam cone (I bought the 15″ cone & cut it)
glue gun
glue sticks
natural sheet moss
vase/stand/pot/container
blown eggs (37 on this 14″ cone)
a popsicle stick
LET’S MAKE IT!
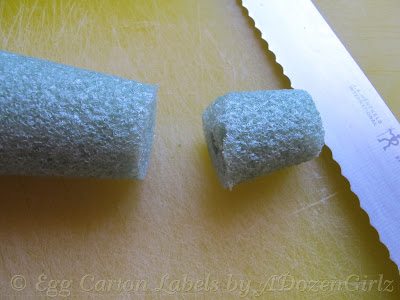
I chose a container for my topiary that was already in my home but the styrofoam cone was a little too tall for the proportions I was interested in, so I cut a little off the top with a serrated knife.
I chose this stand, knowing that the topiary would sit on top of it, not in it, therefore I could start gluing eggs at the bottom of the cone. If using a pot or other stand in which the topiary will sit, mark the area on the cone that will be inside the pot and begin applying eggs above that mark.

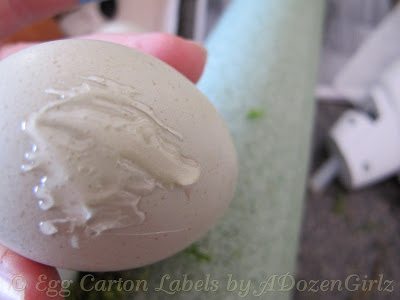
I purchased a specialty glue designed for use with styrofoam. I had never used it in crafting before, but I figured I’d give it a shot. At $5.00 per 4 ounce bottle, I was hoping it would dry faster than school glue, but it didn’t and since I do not possess the patience required to hold over 37 eggs in place until dry, I called upon my trusty glue gun.

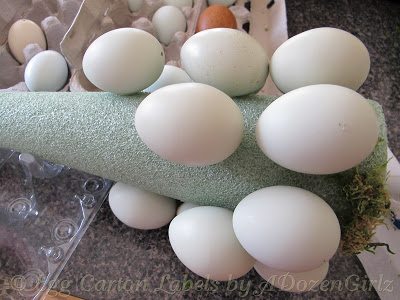
Starting at the bottom of the cone, hot glue was applied to each egg and held gently in place for 10-15 seconds. (Thankfully and surprisingly, the hot glue did not melt the styrofoam otherwise this project would have been scrapped.)
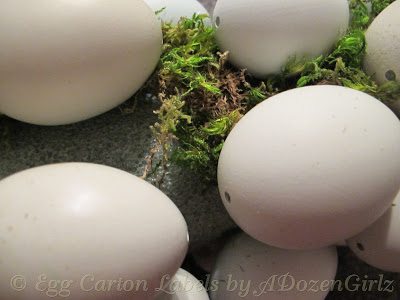
The eggs were spaced far enough apart to allow for moss to be tucked in between later.
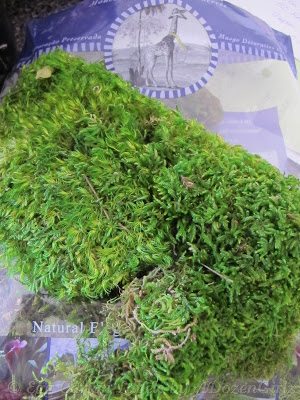
The moss used here came in sheet form and was easy to use. I chose this vibrant green moss color to accentuate the blues and greens in my eggs vs. the brownish greys that were also available.
The hot glue was applied glue directly to to the styrofoam and small pieces of moss placed on top of the glue. A popsicle stick helped press the moss in place and tuck it around the eggs while minimizing the number of burns incurred in this project.
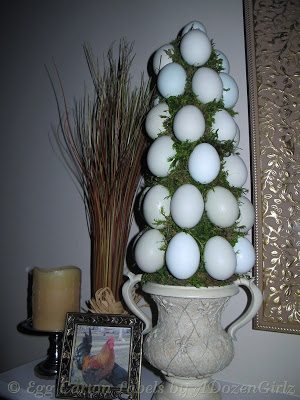
I like how my project turned out and am thankful to my hens who made it possible.
This post is shared at the following blog hops Bloom Designs Online, Craftaholics Anonymous, Craft & Tell, Carolyn’s Homework,Dedicated House,Gettin’ Crafty with It,The Ivy Cottage, Feathered Nest Friday, Fluster Buster, The Pin Junkie, Tip Junkie, SaltTree, Savvy Southern Style, Whimsey Wednesday, Lavender Garden Party, Number Fifty Three, Cottage Style, I Gotta Create

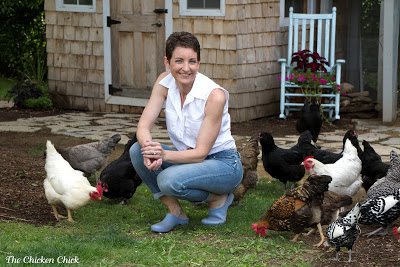
Kathy Shea Mormino
Affectionately known internationally as The Chicken Chick®, Kathy Shea Mormino shares a fun-loving, informative style to raising backyard chickens. …Read on


shop my SPONSORS


I’m always looking for fun projects using blown eggs from my backyard chickens since I started egg-blowing and decorating several years ago. This egg topiary is a great way to display my hens’ beautiful eggs all year long. Once the eggs have been emptied and dried, the project is simple.
DIY BLOWN EGG TOPIARY
SUPPLIES NEEDED
styrofoam cone (I bought the 15″ cone & cut it)
glue gun
glue sticks
natural sheet moss
vase/stand/pot/container
blown eggs (37 on this 14″ cone)
a popsicle stick
LET’S MAKE IT!
I chose a container for my topiary that was already in my home but the styrofoam cone was a little too tall for the proportions I was interested in, so I cut a little off the top with a serrated knife.
I chose this stand, knowing that the topiary would sit on top of it, not in it, therefore I could start gluing eggs at the bottom of the cone. If using a pot or other stand in which the topiary will sit, mark the area on the cone that will be inside the pot and begin applying eggs above that mark.
I purchased a specialty glue designed for use with styrofoam. I had never used it in crafting before, but I figured I’d give it a shot. At $5.00 per 4 ounce bottle, I was hoping it would dry faster than school glue, but it didn’t and since I do not possess the patience required to hold over 37 eggs in place until dry, I called upon my trusty glue gun.
Starting at the bottom of the cone, hot glue was applied to each egg and held gently in place for 10-15 seconds. (Thankfully and surprisingly, the hot glue did not melt the styrofoam otherwise this project would have been scrapped.)
The eggs were spaced far enough apart to allow for moss to be tucked in between later.
The moss used here came in sheet form and was easy to use. I chose this vibrant green moss color to accentuate the blues and greens in my eggs vs. the brownish greys that were also available.
The hot glue was applied glue directly to to the styrofoam and small pieces of moss placed on top of the glue. A popsicle stick helped press the moss in place and tuck it around the eggs while minimizing the number of burns incurred in this project.
I like how my project turned out and am thankful to my hens who made it possible.
This post is shared at the following blog hops Bloom Designs Online, Craftaholics Anonymous, Craft & Tell, Carolyn’s Homework,Dedicated House,Gettin’ Crafty with It,The Ivy Cottage, Feathered Nest Friday, Fluster Buster, The Pin Junkie, Tip Junkie, SaltTree, Savvy Southern Style, Whimsey Wednesday, Lavender Garden Party, Number Fifty Three, Cottage Style, I Gotta Create


Wow, what a coincidence. It was meant to be, JoAnn. :)
Love this project, and it so happens I bought a similar urn at GW! making this soon. Have a happy Thursday!
JoAnn
This is so pretty! I once made a similar one at Easter. Thanks for sharing at Gettin' Krafty With It! Can't wait to see what you've been up to this week!